Aquafaba is the starchy liquid that beans — especially chickpeas — have been cooked in. It is also the liquid in a can of beans. Often it gets rinsed off and poured down the drain but it has a wide variety of uses especially as an egg substitute. There are two sources of this liquid ... from the cans the beans come in or the cooking liquor from preparing your own beans.
Making Aquafaba From Scratch
- Soak 500g of dried chickpeas in water overnight. Make sure that you cover the beans with several inches of water as they do expand as they soak.
- Drain the soaked chickpeas, and then add them to a large pot with 2 litres of water. Do not use any salt or spices. Bring to a boil, reduce the heat and simmer until the beans are tender, 1 ½ to 2 hours.
- Once the chickpeas are cooked, turn off the heat and cover with a lid. Allow the beans to cool down in the cooking liquid. This step leaves extra starch in the liquid, which is what gives aquafaba it’s egg-like magical properties.
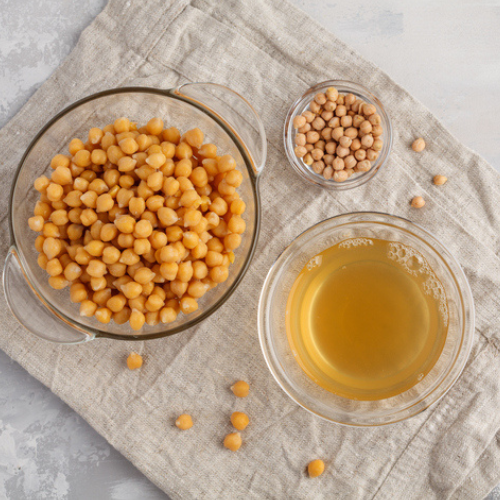
- When cool, remove the chickpeas with a slotted spoon, and then bring the cooking liquid to a simmer and cook for another 30 to 45 minutes. In this time, the liquid should reduce and turn into a thicker, yellowish liquid resembling the liquid that comes out of canned chickpeas.
- Allow the aquafaba to cool, and then store in the fridge for up to 5 days or freeze for months.
When making this from scratch, be careful not to introduce any oil or fats into the liquid. These can cause problems if you plan to whip the liquid later on.
Aquafaba From the Can
- Choose canned beans with low or no salt added so that the liquid is not overly salty.
- Vigorously shake the unopened can of chickpeas, and then open and drain the beans, reserving the liquid. If there are lots of little bits of beans in the liquid, pour it through a fine mesh strainer to remove them.
What Can You Do with Aquafaba?
It was only in 2015 that Goose Wohlt, a software engineer looking for ways to make egg-free meringues, discovered the magic of bean water. We already know that it works as a thickener, stabilizer, binder and emulsifier, but it’s safe to say that uses for aquafaba are still being discovered. Here are the most common uses that we know of.
- Egg white and whole egg replacer in baked goods like pancakes and muffins
- Make egg-free meringue or pavlova
- Make whipped desserts vegan, like chocolate mousse.
- Make vegan buttercream
- Make vegan whipped cream or ice cream
- Make vegan mayonnaise or aioli
- Make extra creamy hummus
- Make vegan butter
- Thicken soups
How Do You Use Aquafaba As An Egg Replacement?
Aquafaba mimics many of the characteristics of eggs in baking. Here’s a general rule when replacing eggs with aquafaba:
- 3 tablespoons of aquafaba = 1 large egg
- 2 tablespoons of aquafaba = 1 egg white
Aquafaba can be used as an egg replacer in three ways:
- Use a hand whisk and whisk until light and frothy then use as an egg binder in cookies, pancakes and muffins.
- Whip into soft peaks and fold into batters that benefit from added airiness like waffles, muffins and cupcakes.
- Whip into stiff peaks and use to make meringue, ice cream or vegan macarons.
Cream of Tartar
You can whip aquafaba without cream of tartar, but we recommend adding the cream of tartar to help the foam stay whipped for as long as possible (1/4 tsp cream of tartar to 120ml of aquafaba). Whipped aquafaba by itself will deflate pretty quickly. You can rewhip it, but who wants to do that? So instead, we add a little cream of tartar to help stabilize things. Once it is whipped, you can use it in your favourite recipes.
It can take a while for aquafaba to whip so please do not let that discourage you. If yours isn’t whipping as quickly as you’d hoped, just keep with it. Some people have noted that it took them 10 minutes of whipping! We usually see soft peaks within 4 or 5 minutes, but if that’s not true for you, keep going, it will eventually get there.